DIY Absorption Ceiling Cloud
After I published the first measurements of the effectiveness of my new ceiling absorber two weeks ago, I would like to explain the construction method to you today using some pictures.
As already mentioned when building my wall absorbers, my expertise is in the audio area and not in wood processing. So take my instructions as a source of inspiration without any claim to perfection or completeness!
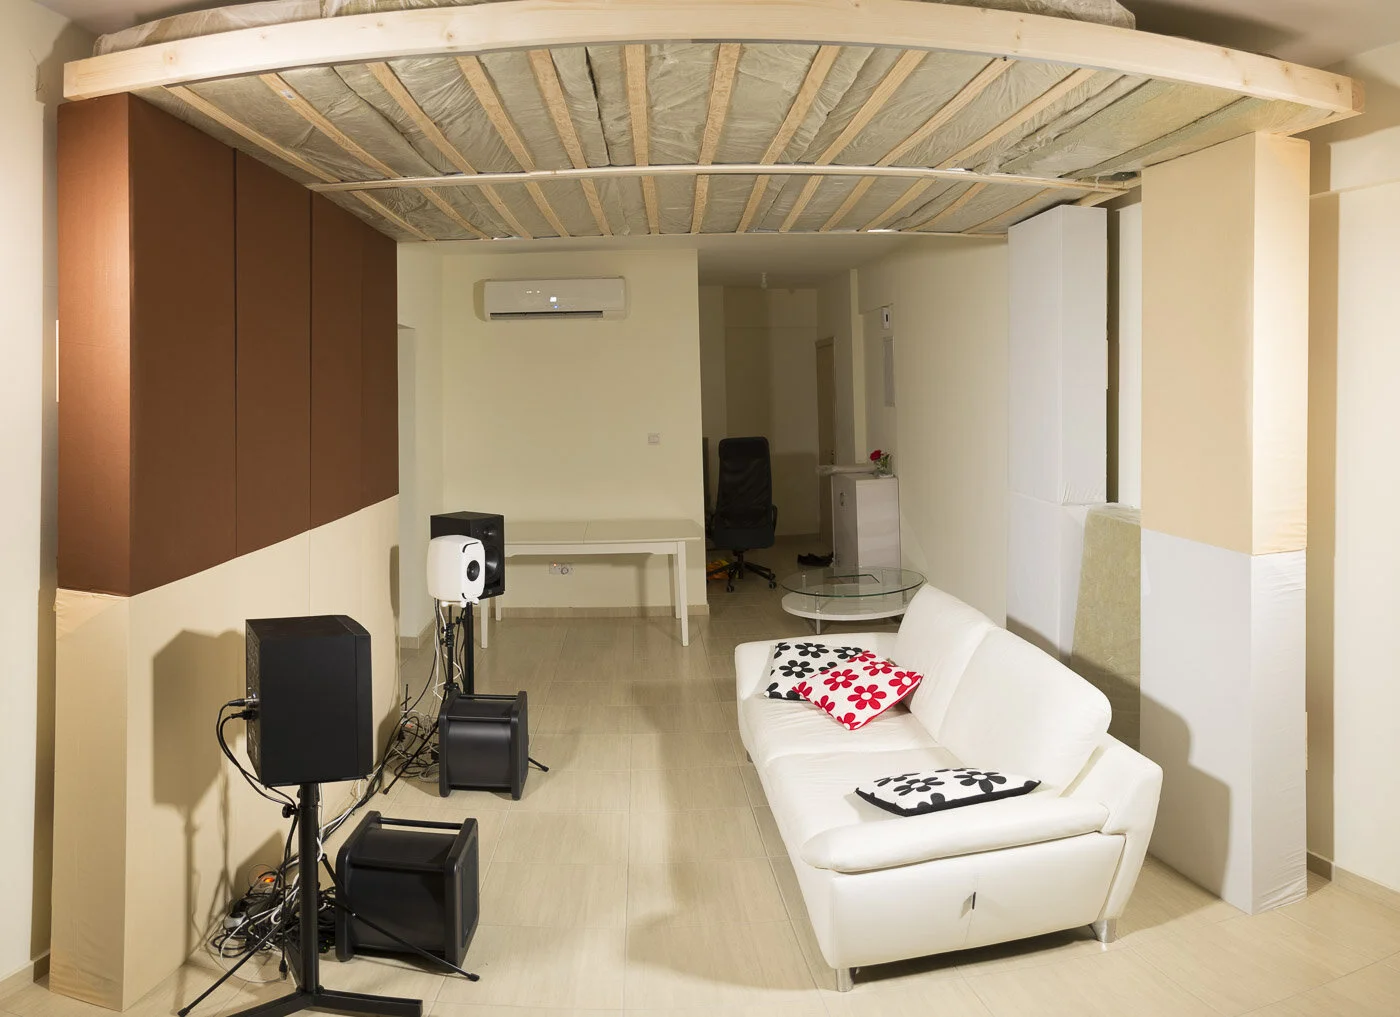
I chose a larger panel for the ceiling absorbers than the previous absorber modules. My goal was to spare the masonry first and choose a wooden structure that could be placed on top of the existing absorbers.
Ultimately, all planning begins with a review of the available components. In my case, I was able to buy 3-meter-long (10’) wooden beams in my nearby hardware store. I also wanted to use the stone wool mats in 120cm x 60cm (47’ x 23’) if possible without further processing.
The result is a stable wooden frame in which the rock wool fits across. Fortunately, the 3 meter length (10’) fits exactly with 5 rock wool packages of 60cm (23’) each. So that the rock wool does not sag, I have installed a small slatted frame.
The list of material
Here is my list of material (for one of the two ceiling clouds):
Frame: wooden beams 88x44mm (4”x2”), 2 pieces each 300cm (10’) and 129.5cm (4.2’)
Slatted frame: 14 pieces of wooden slats 40x9mm (1.5”x1/3”), each 120cm (4’)
Aluminium L-profile: 2 pieces of 260cm (102’), 280-290cm would be better
4x L-angles to stabilize the frame
screws
Most hardware stores saw the wood for free according to your specifications. Fortunately, our actual work is limited to assembly. I only used a cordless drill / screwdriver and a suitable open-end wrench for the large screws.
So let's start! 💪
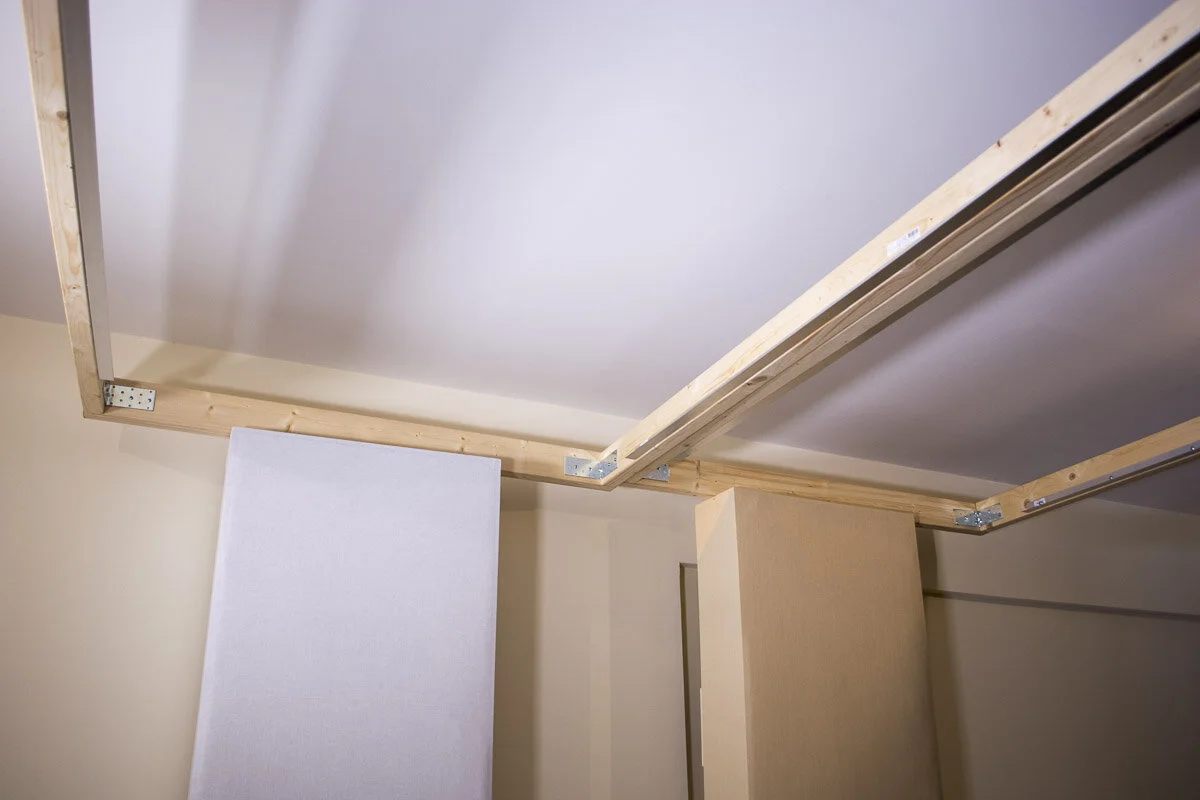
The wood frame
First I screwed the aluminum profiles onto the long wooden beams. Since I later want to stretch a fabric in front of the absorber, the aluminum profile must of course not protrude, but should rather be a millimeter too far inside.
My aluminum profile was quite unstable, so I used a screw every 20-25cm (8-10”).


Next, the wooden frame is laid out on the floor and connected with the L-angles. One screw on each side is enough to fix the frame for now. For drilling the large holes, it is ensured that everything is at a right angle and nothing can slip.
The rock wool has a total weight of about 36kg (80 lbs) per cloud (5 packages of 7.2kg (16 lbs) each with a thickness of 20cm (8”) and a density of 50kg / m³). That's why I chose two additional large screws per corner. Because who knows what I would like to hang on this frame later - lamps, flowers, loudspeakers ... Better build a number more stable than necessary!
[Addendum 15.3.2020: I would now use significantly lighter mineral wool at 20cm absorber depth. See my blog article Which material is best as an absorber.]


It was easier for me to first put this finished frame in the right place on the wall absorbers. Depending on how many helpers and ladders you have available, you can of course build the ceiling cloud completely on the ground first and then carry it to the correct position.
In the long term, I have in mind to hook the frame to attach it to the ceiling. Fortunately, the height already fits very well and I can postpone drilling into the masonry until later if I am certain about the exact position.
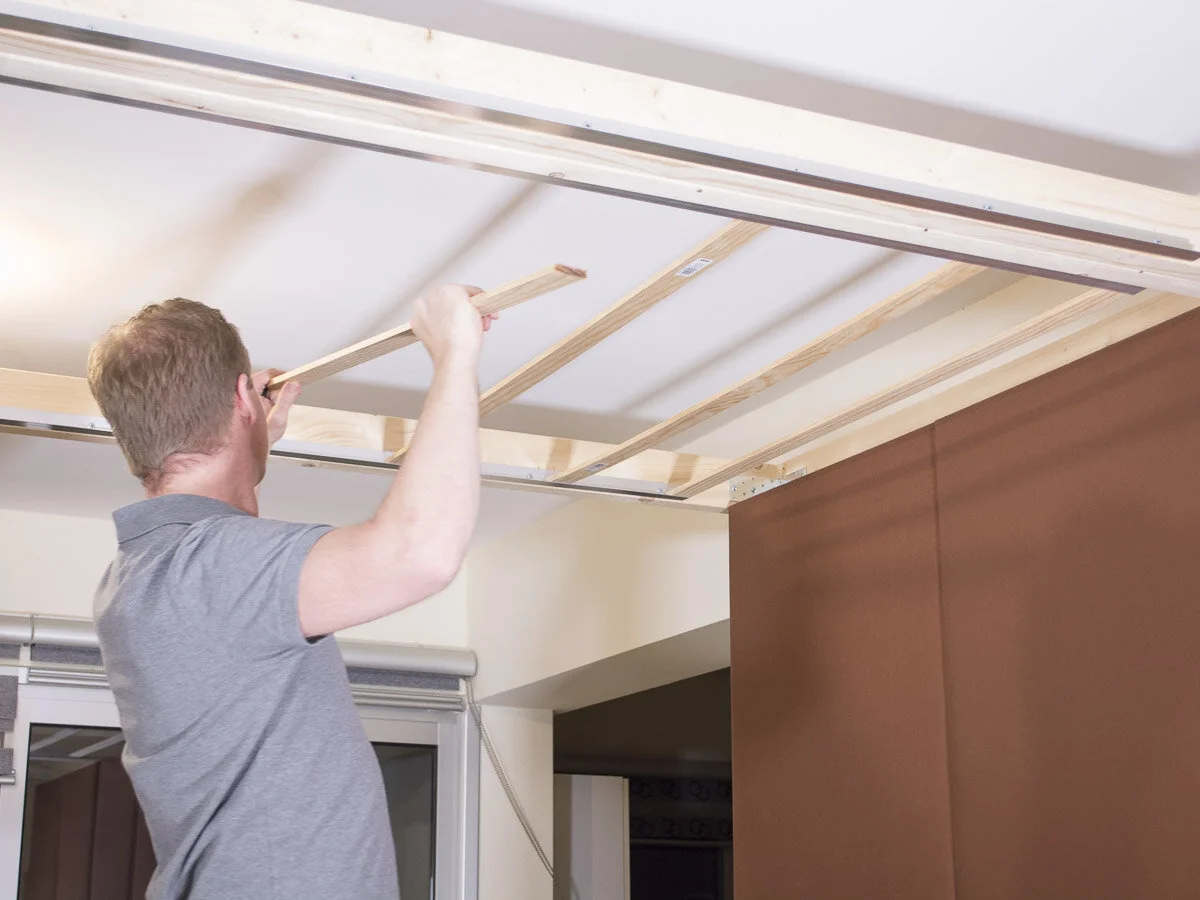
The slatted frame

The thin slats hold more than firmly on the aluminum profile with double-sided adhesive tape. A screwing would be quite complex and is not necessary in my experience.

The rock wool packets
Since I have already held several cubic meters of rock wool in my hands, this time I wanted to wrap the rock wool in thin film beforehand. Unfortunately, it does not fail to not only get your clothes dirty, but also to bring your skin into contact with this material. I already know that I will touch and move these packages even more often.
As a rule, you learn with every step and get new ideas. The route is the goal! If the rock wool is nicely packaged, it is easier to move and, if necessary, try out and measure different scenarios.

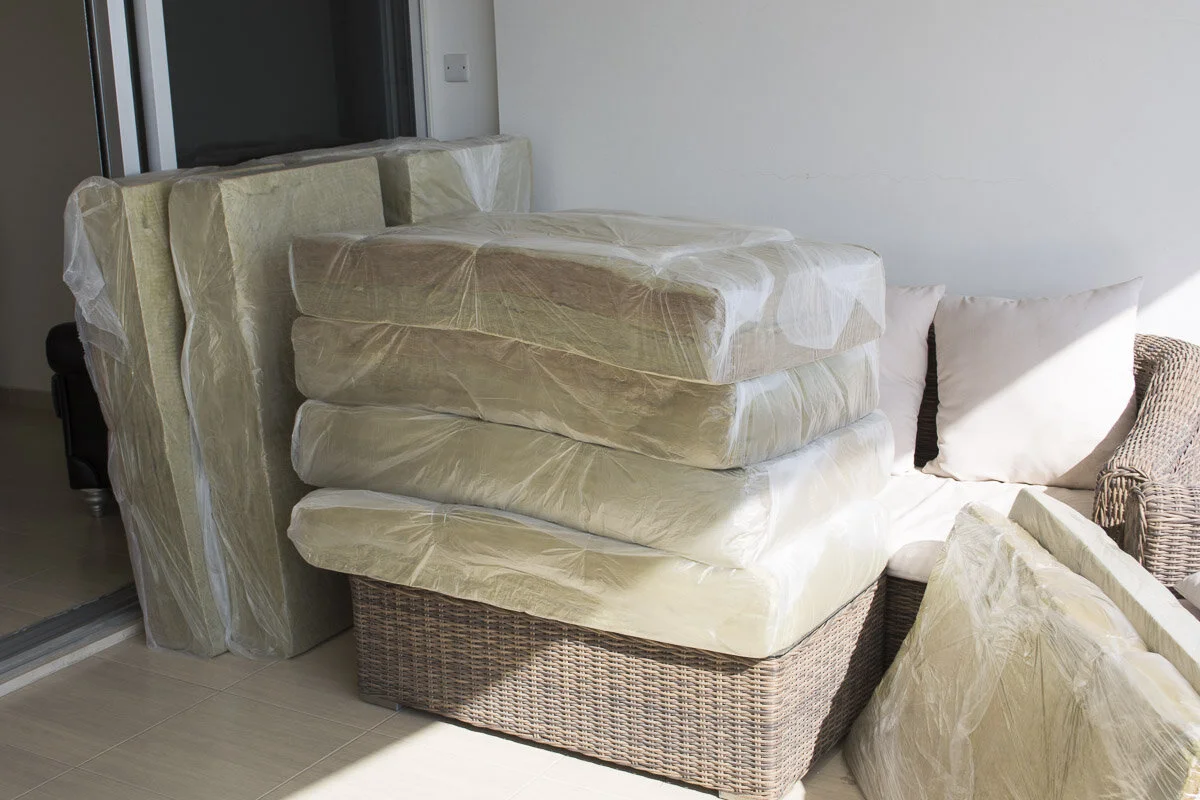
I took the thinnest masking sheet I could find. Of course, the rock wool is no longer 100% absorbent, but will reflect a small part at high frequencies. As long as only one layer of film is used on the visible side and the part with the overlapping film is turned towards the wall, this is limited.
And for the extra portion of cleanliness in my living room, I am happy to accept this anyway!

The last step is to use the rock wool packages. The first time I used the packages from below together with the slats. Since I have enough space on the side, I can remove and reinsert the packets at any time. This was very helpful for the before / after measurement, since I had removed the speakers and microphones during assembly. However, a proper comparison measurement is based on the fact that only one parameter (i.e. the rock wool) is changed if possible.
A large cloth will of course later be stretched around the ceiling cloud so that it is not only acoustically but also visually a pleasure to listen to music!
For a long time I was skeptical of how I could manage not only to treat the walls acoustically but also the ceiling. Once you have an idea and a plan, the whole thing is finally done in a single day!
I hope you were able to take some incentives and a good dose of motivation for you when reading through! I can promise you that the effort is worth it! I have already shown acoustic comparative measurements with and without ceiling cloud in another blog article.
I would be very happy to see a few pictures of your living room or recording studio! Feel free to send me a message with your comments and suggestions!
Blog-article: Measurements Ceiling Absorber
Blog-article: DIY broadband absorber
Blog-article: Rock wool, glass wool, hemp - which material is best suited for absorbers?