Measurement Microphone Comparison
BEHRINGER ECM8000 VS. BEYERDYNAMIC MM1 VS. ISEMCON EMX-7150

It is not uncommon for music lovers to ask questions such as "which speaker is the best?", “Which amplifier is the best?” and “which measurement microphone is the best?". And no matter which product you choose, if you are willing to spend more money, then somewhere you are guaranteed to get a product that is "better" than your own. A speaker for EUR 2000 will usually be better than one for EUR 200. And a speaker for EUR 20,000 will probably be even better than the speaker for EUR 2,000.
The market for measurement microphones is somewhat more manageable than that for loudspeakers. But still: we find microphones for EUR 30 and those for over EUR 2000. The big question you always have to ask yourself: Do the technical differences have an advantage for my application? And if anything, is it worth the extra charge? Or can I compensate for the product disadvantage of the cheaper microphone in another way?
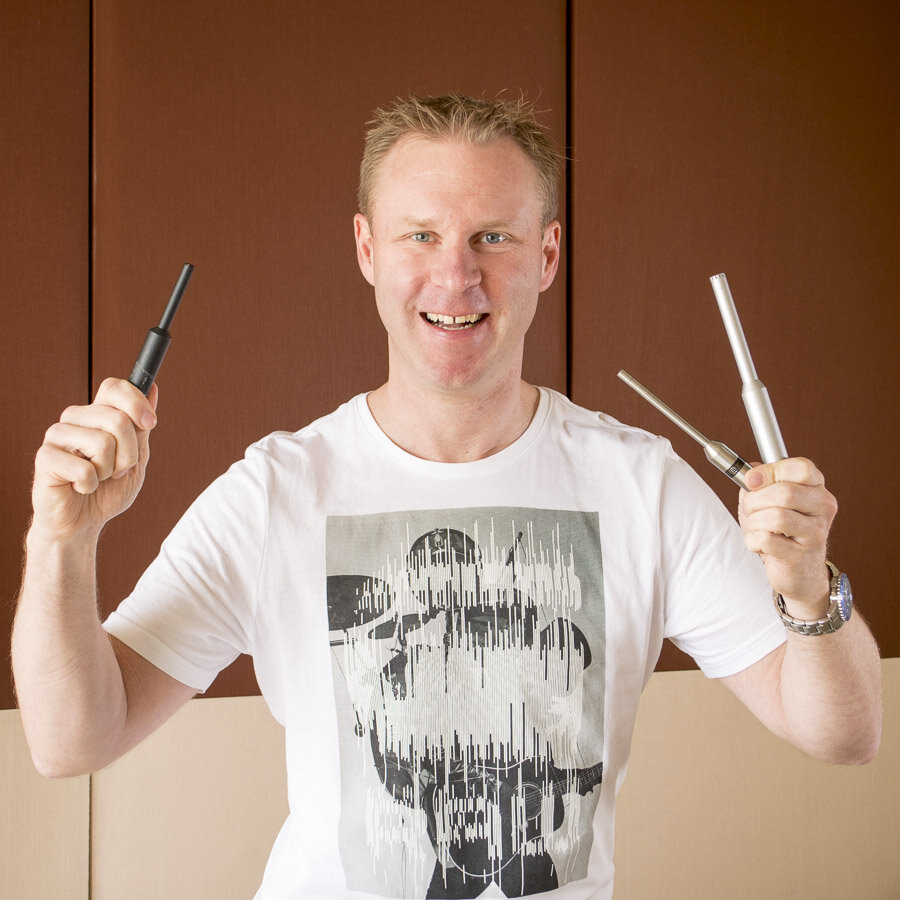
Specifically, three different measurement microphones have accumulated in my microphone case over the years:
iSEMcon EMX-7150 (approx.EUR 253, Manufacturer)
If you are about to decide on your first measurement microphone, then of course you want to make sure that the measurement results are usable and you do not save in the wrong place. Exactly this question I will answer today based on measurements from practice. First, let's take a look at the differences that we will encounter at all. The question of the extent to which this difference is relevant for us must also be clarified.
QUALITY FEATURES
Each manufacturer usually provides some important specifications about their microphones. Of course, such values are sometimes embellished for marketing reasons, but they still give us a first clue. I have compared some typical measuring microphones in the following table:
| Manufacturer | Type | Price (ca. EUR) |
Max SPL | Min SPL | Sensitivity (mV / Pa) |
Diameter | Equalization | Weight |
|---|---|---|---|---|---|---|---|---|
| Behringer | ECM8000* | 34,- | n.a. | n.a. | 15mV** | 12mm | Diffuse-field** | 136g |
| Beyerdynamic | MM1* | 155,- | 122dB (1%THD) | 26dBA | 15mV | 9mm | Diffuse-field | 88g |
| iSEMcon | EMX-7150 | 253,- | 146dB (3% THD) | 30dBA | 6mV | 7mm | Freefield | 75g |
| Earthworks | M23* | 522,- | 140dB | 20dBA | 34mV | 7mm | Freefield | 160g |
| Earthworks | M30* | 729,- | 140dB | 20dBA | 34mV | 7mm | Freefield | 225g |
| DPA | 4006a* | 1999,- | 147dB (10% THD) 136dB (1% THD) |
15dBA | 40mV | 12mm | both (changeable grid) | 163g |
| DPA | 4007A | 2166,- | 159dB (10% THD) 139dB (1% THD) |
24dBA | 9mV | 12mm | both (changeable grid) | 161g |
Maximum sound pressure
First of all, we have to enjoy the manufacturer's information with caution. The more expensive the microphone, the more precise the information. In the lower price range, the information is often missing or is very vague. This can mean that the manufacturer himself does not know exactly how well his microphone is doing. It is more likely, however, that the manufacturer knows what the values of his microphone look like, but that the values are either comparatively poor or vary greatly from microphone to microphone.
If you want to compare the maximum sound pressure values, you have to compare apples with apples. It only makes sense to compare the values with the same threshold. The DPA example shows that depending on the threshold (e.g. 1% or 10% distortion), very different values can come out.
Since the manufacturers use different distortion threshold values or do not specify them, comparability is unfortunately not 100% possible.
Nevertheless, we have to consider the situation in which we will use our measurement microphone later. My measurements are mostly in the 75-85dB SPL range. I am usually far above the background noise in the respective room. It usually doesn't have to be louder. And all microphones are more than adequately designed for this.
If you want to monitor the frequency response or record the sound pressure during a loud concert, you might find volume levels in the range of 110-120dB. This is possible with all microphones - although the Behringer is not clear here due to the lack of information.
Then why are there any microphones that can tolerate over 140dB SPL?
First of all, the high-quality microphones from DPA are of course also used for musical recordings. And if you want to place the microphone directly in front of the trumpet or timpani, then you are well advised if you provide sufficient reserves! For this reason, DPA offers two very similar microphones (4006 and 4007), which differ mainly in terms of possible sound levels.
But it is also possible in the field of measurement technology that we want to measure such high sound pressure levels. On the one hand, we might want to determine in the laboratory what maximum sound pressure we can generate with a loudspeaker. And of course the microphone has to be able to withstand significantly more sound pressure before it distorts than the speaker can deliver - usually at a distance of 1m.
On the other hand, in live applications we could be tempted not only to set up our measurement microphone in the audience area, but perhaps to bring it very close to the PA. This would allow us to monitor the direct sound of the speaker without the background noise of the audience. Each time the distance is halved, the sound pressure increases by 6dB. So if the audience is exposed to 110dB SPL, it would quickly be over 120dB SPL at a short distance from the speaker.
However, the applications where you need over 120dB SPL are extremely rare. Especially for measurements in the recording studio and living room, none of the above microphones reaches their limit with regard to maximum sound pressure.

Noise Level
As an opponent of the maximum sound pressure, there is of course also a minimum sound pressure. This point is reached when the microphone's own noise is louder than the ambient noise.
Now we have to keep in mind the environment in which we are likely to take our measurement. Recording studios have to struggle to ensure that their insulation is sufficiently thick and conscientious, that they can even manage a room with a quiet level of 30dBA. If you want to carry out measurements that confirm exactly this quiet level, then your measuring microphone should of course be below it. And this usually means a corresponding price for the microphone and also for the preamplifier.
For everyone else (including me) who do not measure the noise level of the room, but a loudspeaker, can safely neglect this point. The ambient noise is usually in the 40-50dB range anyway. And with our measurement signal, we will usually be above it, around 70-80dB. Whether the microphone is noisy at 30dB or at 20dB, we will never be able to see that in any measurement curve outside of a laboratory.
For this reason, all the listed microphones are suitable for the frequency response measurement of loudspeakers. As long as the noise level of the microphone is in the 30dBA range or below, there are no advantages or disadvantages.
Sensitivity
The output voltage that a microphone delivers is first of all a purely quantitative and not qualitative value. The microphone preamplifier can usually be adjusted to adapt the signal to the actual sound pressure.
When it comes to sensitivity, we're talking about values in the range from 6mV to 40mV per Pascal. Meaning how much voltage does the microphone output with a defined acoustic sound signal. The difference between the microphones is therefore approx. 16dB [= 20 x log (40mV / 6mV)].
Nevertheless, as is so often the case, there are extreme cases in which this value makes a difference. Let's take the two extreme examples from the previous points:
If we dive into the range of over 120dB in front of the trumpet or close to the PA, some microphone would generate voltages that could overdrive a microphone preamplifier. If we expect this sound pressure range, then we should choose a microphone in the lower range of sensitivity.
If, on the other hand, we measure very quietly or record music in a quiet room, it is advantageous for the signal quality if the microphone already delivers a decent signal. As a result, the subsequent microphone preamplifier does not have to be turned up that far. And we also reduce the influence of interference signals on the cable route. The DPA 4006 with its rather high output voltage is therefore often used as the main microphone for classical music (a few meters away from the orchestra).
For the usual areas of application of a measurement microphone, i.e. if we import the measurement signal ourselves and do not expect a sound pressure of over 120dB, all the microphones listed are still in the race.
Diffuse Field vs Free Field Equalization
Most measurement microphones have free field equalization. This means that the frequency response is as linear as possible for sound arriving at the front (at 0 °).
I have already examined the differences for my three microphones in another article, which has an angle change on the frequency response. In short: at high frequencies, the sensitivity decreases by a few dB when sound arrives from the side.
There are therefore microphones with a diffuse-field equalization that deliberately add a height boost. For sound in a diffuse sound field, i.e. from all directions, this results in an average linear frequency response. However, the frequency response in 0 ° then shows an elevation.
The equalization curve is not a quality feature. It only depends on the purpose! Some microphone manufacturers such as DPA therefore supply their microphones with interchangeable grids so that you can use one or the other depending on the situation. Other manufacturers such as iSEMcon provide their microphones with correction curves on a USB stick so that you can use these correction values in your measurement software and also choose between the two equalizations depending on the situation.
The majority of our loudspeaker measurements will be carried out in direct sound. There will always be reflections from the side walls, but (hopefully) the main energy will come from the speaker. So I always use microphones with free field equalization and point my microphones towards the speaker.
Beyerdynamic writes openly about the MM1 that it has a diffuse-field equalization. This is not bad at first. You just have to keep in mind that you will measure an increase in the high frequencies for the 0 ° direction in an open field application. In order to achieve a nice straight frequency response on the screen, you can either turn the microphone so that the speaker no longer arrives at 0 ° but rather at 60 °, or you can obtain suitable correction values or create them yourself for the measurement software.
From my personal experience, I would always buy a measurement microphone with free field equalization. Not every manufacturer provides correction data and not every software offers the possibility to use such correction data. And especially during your first attempts at home, you will only measure in the open field - as long as you are not starting in a reverberant bathroom!
Mean Variation
A point that we unfortunately are not given by the manufacturer and that we can hardly check ourselves is the variation from microphone to microphone. That how big are the deviations between the microphones of one type. The nicest frequency response curve of your colleague is of no use if the copy that you buy tomorrow might show a completely different curve.
One can only roughly estimate with common sense that cheap microphones are very likely to have a higher dispersion than expensive ones. For one thing, the actual production quality is probably lower for low-budget products. On the other hand, the quality inspection process at the manufacturer is not at the level of a high-end manufacturer.
However, there is a way how we as a customer can be reasonably certain that our copy actually has a certain standard and will be usable for us. We can make sure that we get an individual measurement curve for each microphone. And by that I don't mean the standard curve in the product brochure, but a very individual one from this one microphone. Because if there is this curve and data, whether on paper or as a PDF or as a text file, then we can be sure that someone at the manufacturer has unpacked our microphone and checked it individually.
And in addition, we can sometimes even import this correction data into our software and receive a further improvement in the linearity of our measurement setup.
Robustness
The best microphone is of no use if it gives up its mind within a short time. As long as you familiarize yourself with the measurement technology and the microphone is only in your living room next to your system, this point may not yet play a major role.
But if you already know that the topic of measurement technology is only of interest to you because you want to measure your system at concerts every week in the future, then this point should not be underestimated.
Fortunately, all measurement microphones that I have picked up so far are at a good mechanical level. In addition to the actual microphone, the longevity of your microphones naturally depends not only on the microphone itself, but also on the accessories. Is the tripod stable and heavy enough that it doesn't tip over? Do you have a stable case for your microphones so that they remain intact during transport? I can recommend this small and light case to the last point, in which I transport my 7 microphones together with the calibrator: Thomann*

Capsule diameter
I don't want to bore you with a theoretical treatise on the advantages and disadvantages of the membrane diameter. Of course, it is advantageous to use a membrane that is as small as possible, because the omni-directional characteristic then theoretically remains even at high frequencies and the drop in height at lateral angles is not too great. And of course it is advantageous to use the largest possible membrane, because then the signal-to-noise ratio is as high as possible.
If we look at the various measuring microphones on the market, one thing should be clear: the capsule diameter is not important! There are good and bad microphones with a small diameter. And there are good and bad microphones with a large membrane.
Nevertheless, the size is important for a very practical reason: you may want to calibrate the measuring system to absolute dB SPL later. Be it because you are just curious how loud you generally listen to your music. Or how loud you mix your band. Or also because you (or your client) are legally obliged to keep a record of every event. Then at the latest you will think about buying a calibrator.
And then at the latest the question of the capsule diameter will come up! Because calibrator and measuring microphone should fit together mechanically.

You can always add adapters to the standard calibrators for the standard microphone sizes: 1 ", 1/2", 1/4 ", i.e. 25mm, 12.5mm and 7mm. If you buy a microphone that adheres to this standard, you will find it easy to find any calibrator with a suitable adapter later on. For example, the iSEMcon EMX-7150 fits exactly into the 1/4 “adapter. The Behringer ECM8000 fits exactly into the 1/2 “adapter. The Beyerdynamic is in between and can therefore not be used exactly.
Temperature range
What environments do you think of when you grab your measurement microphone and want to optimize the sound of your speakers? Do you have a winter jacket and thick gloves with you?
When I think of my measurements over the past 20 years, I've never had a winter jacket on! Nor have I been in the desert until now. Nevertheless, I would like to mention this point, of course, because every microphone certainly has a certain temperature range in which it delivers reliable results. In most cases, the microphone should still work even if you have already given up! For the usual measurements at home or at concerts, we will probably be in the range of 15 to 30 degrees Celsius. In my view, we can therefore ignore this criterion for our decision. But if you have a job in Antarctica soon, don't claim I didn't mention it!
The Test Setup
But now finally to practice! In the first step, I simply glued my three different measurement microphones as close together as possible and placed them 50 cm in front of my Genelec 8331 studio monitor (Thomann *). I used Smaart V8 (Rational Acoustics) for this comparison.
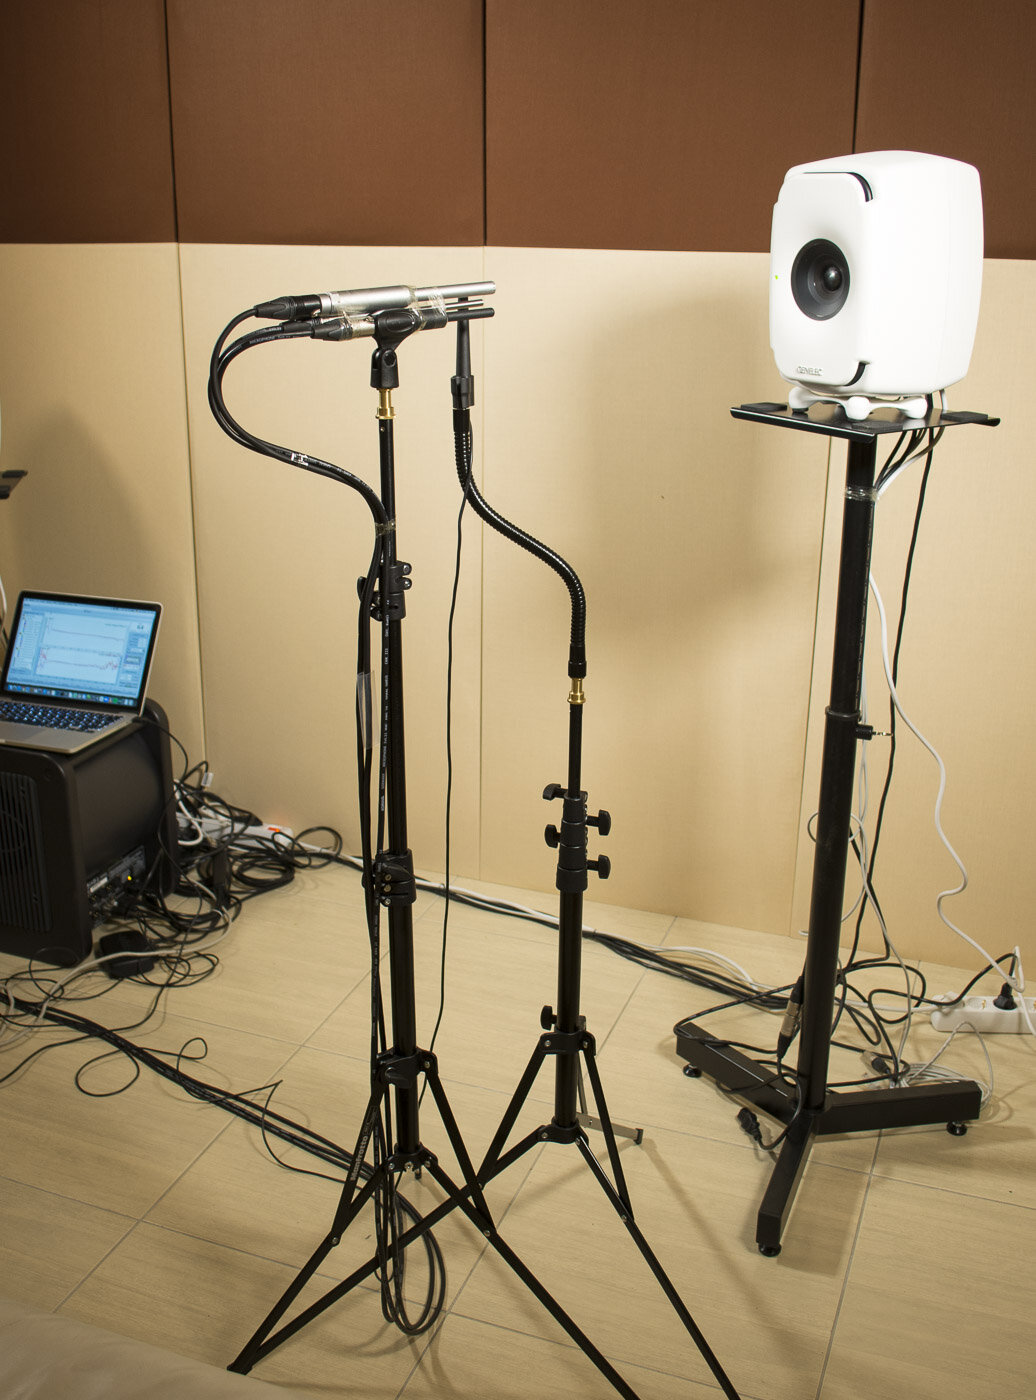
First finding: the difference in sensitivity roughly matches the manufacturer's specifications. I increased the iSEMcon by 6.5dB for the further measurements so that all three curves are equally loud [20 x log (15mV / 6mV) = 7.95dB]. Incidentally, the Behringer ECM8000 is exactly the same as the Beyerdynamic MM1, so I added its sensitivity 15mV / Pa in the table for the Behringer.

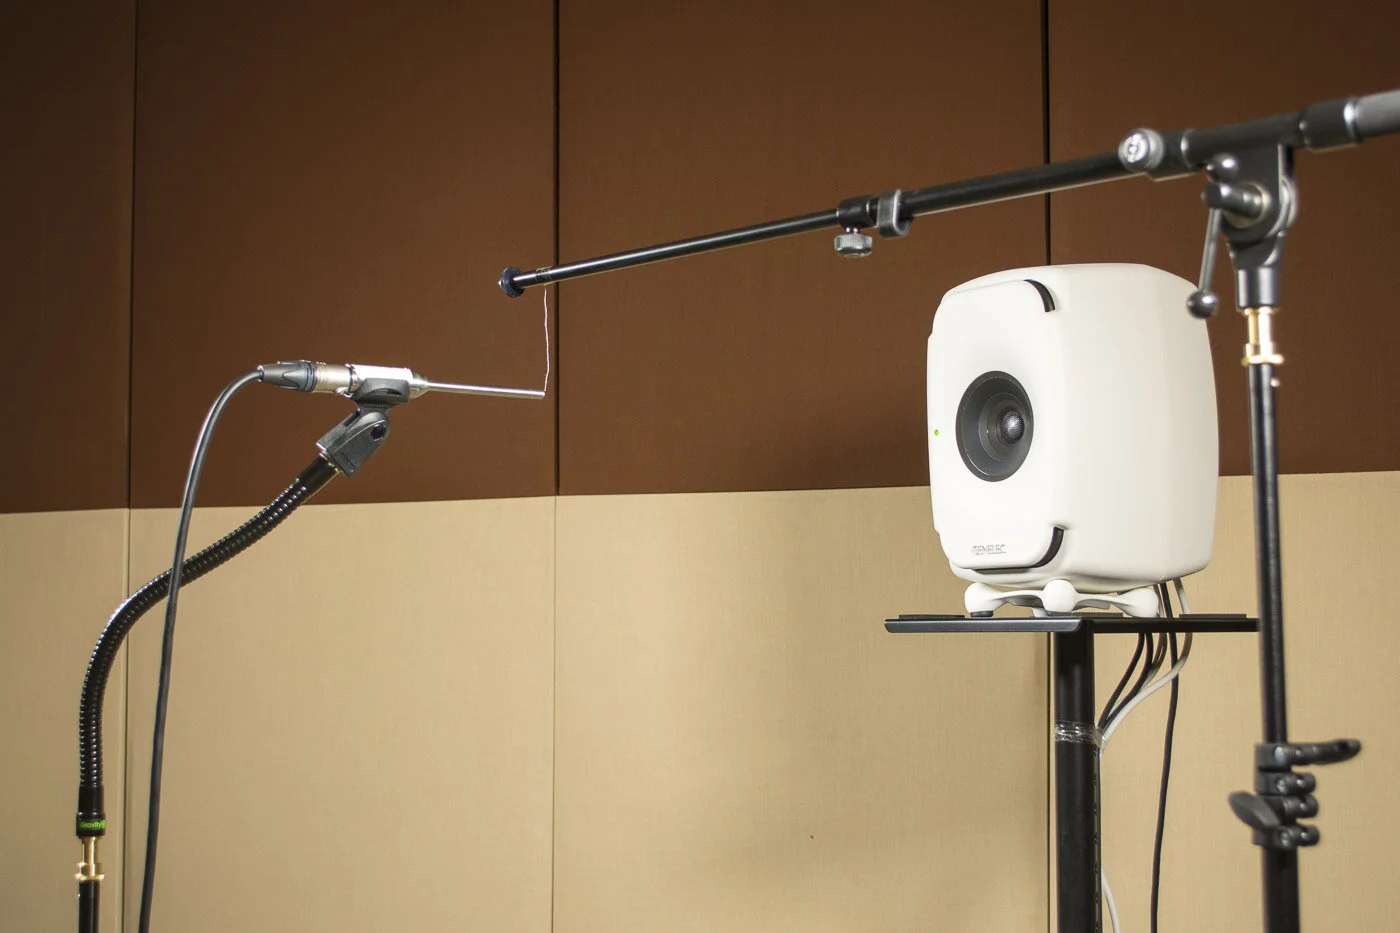
There are hardly any differences for the low and medium frequencies. But at the high frequencies there are unfortunately some influences in the form of interference due to the proximity to each other. I therefore marked the microphone position exactly with a string and then measured the three microphones individually again.
With iSEMcon, I loaded the manufacturer's correction values for free-field equalization in Smaart. So here I am very sure that I can expect a straight frequency response if I point the microphone at 0 ° to the speaker. Of course, this does not mean that the Genelec loudspeaker must or should be perfectly straight. On the one hand, there are still questions of taste about the sound of a loudspeaker. On the other hand, the room also plays a major role for low frequencies.
Nevertheless, the curve of the iSEMcon (green) roughly shows my expectations - more or less linear up to the highest frequencies.

Up to 2 kHz there are no noteworthy deviations between the three microphones. The curves diverge slightly above this. The scale in the frequency response is chosen extremely so that you can see the differences well. At 2kHz, the Behringer ECM8000 (red) is about 2dB above the iSEMcon and the Beyerdynamic MM1 (blue) in between. The difference grows to around 3dB at 16kHz. By the way, the smoothing in Smaart is set to 1/12 octave.
Since Beyerdynamic classified the MM1 as a diffuse-field equalized, this slight increase in altitude is within our expectations.
Behringer has classified his microphone as free-field equalized, but in comparison comes much closer to the MM1 than to the EMX-7150. So I personally would classify the Behringer ECM8000 as diffuse field equalized (at least my copy).

Difference measurement
As a last test, I had fun setting up the EMX-7150 and the ECM8000 side by side. As a representative of free field equalization, the EMX-7150 is oriented at 0 degrees to the loudspeaker. In contrast, I set up the Behringer at 60 degrees. Both capsules are positioned approximately at the string marking.
Smaart has a very useful feature for this and allows the difference measurement between two inputs. So I chose Behringer as the measurement signal and the EMX-7150 as the reference signal. And lo and behold: the curves are almost identical!

Up to 12kHz, the difference between the two microphones is less than 1dB when using the angle according to their equalization. And now we are with the actual question of this blog article:
Conclusion: how cheap can a measurement microphone be?
As so often: it depends! Thanks in particular to the latest comparison between Behringer and iSEMcon, it should be clear that the qualitative differences between the measurement microphones are extremely small for most applications.
And I don't want to doubt the price or the quality that some well-known and established manufacturers deliver. Microphones from DPA and Earthworks, for example, offer unmatched quality in terms of measurement technology. Depending on the application, they are the best you can get today. And there are a number of areas where you need and should pay for exactly that.
Laboratory measurements of any kind, regardless of whether the level of quiet in the recording room or maximum level or distortion of speakers can only be mastered with the highest quality microphones.
However, there are also a large number of situations in which a microphone for 30 euros provides the same measurement results as a microphone for 1000 euros. Provided you know your equipment and can interpret the results.
And one must not forget one thing: for the price of one good microphone, you get a number of microphones in a cheaper category. So you are prepared if a microphone is broken due to a fall. And at home you can calmly measure all the microphones one after the other and check whether one of them has a deviation from the rest and then send it back or have it repaired if necessary.
Recommendation for beginners
For all home use I would like to clearly advise you to start with a measuring microphone for less than 100 euros. Ultimately, the measurement and interpretation is not done by the microphone, but by you! The microphone together with the analyzer software shows you data such as the frequency response so that you can make decisions and change parameters if necessary.
More than 90% of all questions can be answered with every microphone in the world: level relations, delay times, phase relation between subwoofer and main speaker, determination of room modes, standing waves to help speaker placement, etc. Only for the very few times that you are concerned with frequencies above 4kHz, it takes a certain amount of attention to interpret the displayed frequency curve.
Recommendation for advanced users
If you have a few months of experience in calibrating and optimizing speakers and want to take a step forward, there are two options:
on the one hand, you can simply buy more microphones of the same type that you already own. This would allow you to try out different settings on your DSP (level, delay, filter, EQ) and measure directly at several positions at the same time without having to move your microphone each time. I love this way of working and I am sure it makes my results faster and better. It would be a big step back for me if I exchanged my seven microphones for a single one, even if it cost 100 times as much.
The other option is to add a higher quality microphone. You can achieve an improvement in particular if you use a microphone with suitable individual correction data for your measurement software. Because then you don't just have a reliable microphone. You could also check your previous cheaper microphones with this "calibrated" microphone and make any correction data yourself. This price range starts at around EUR 250.
For applications in the recording studio and in the living room, I would probably switch to a single high-quality microphone quite quickly. The distances are short so that you can switch different microphone positions without any effort. And it is very unlikely that your microphone will get damaged or stolen.
For applications in theaters, operas, concert halls, arenas, etc., I would quickly add several microphones. I feel very well positioned with my iSEMcon EMX-7150. There is calibrated data for my Smaart software, and the microphones are affordable enough that I can use several of them.
I would only recommend the price range from 500 EUR for laboratory measurements or very manageable environments. The information gain is almost zero for normal applications. In contrast, the effort that you have to spend to supervise your expensive equipment and make every move yourself or to take out equipment insurance increases significantly. If a microphone for 30 or even 250 EUR actually falls off or disappears, the shouting is not quite as great as when it comes to a microphone of 1000 EUR and more. When we use it professionally, we usually talk about several microphones that have to be left unattended during the lunch break.
I hope I was able to give you some insight into the decision-making criteria that I have used to buy my measurement microphones over the past few years, and still will. Whichever microphone you choose, I wish you a lot of fun and success with measuring and listening to music!
* Affiliate Link
Blog article: Which angle is correct for the measurement microphone?
Blog article: How to measure room modes with REW (freeware)
Blog article: Useful switch features for Dante application